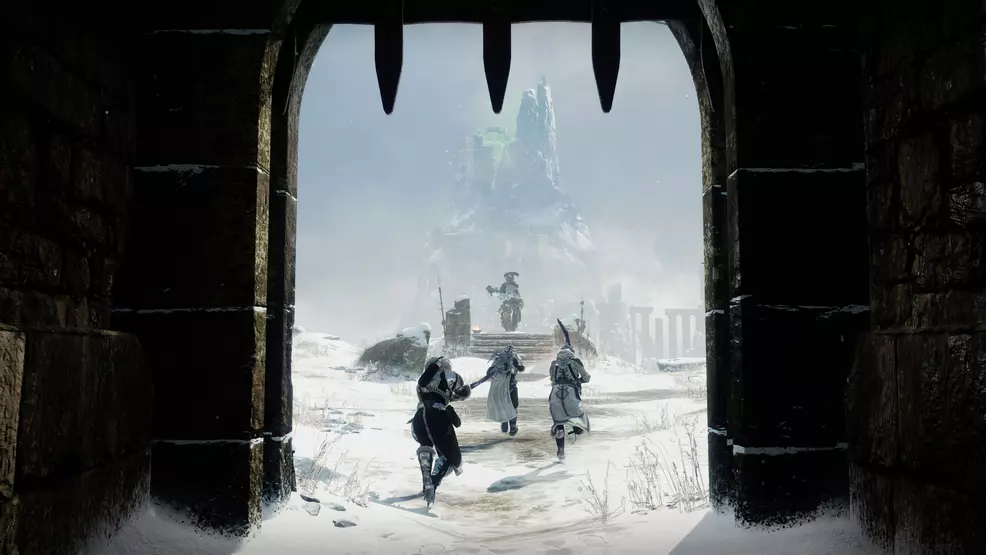
Warlord’s Spoil is the most recent dungeon in Future 2 added with Season of the Want. This dungeon launched on December 1, 2023 and took gamers to a fort excessive up within the mountains within the EDZ to take care of an Ahamkara risk. This Warlord’s Spoil information will assist you to full the dungeon and gives excellent weapon recommendations, boss DPS methods, and extra.
Warlord’s Spoil dungeon information
Warlord’s Spoil consists of three boss fights, a jail puzzle, and some leaping and navigation sections. Use the hyperlinks to leap to the part you want:
Begin Warlord’s Spoil
Earlier than beginning Warlord’s Spoil, you should go to Ikora within the Tower and gather the hunt, Within the Shadow of the Mountain. When you might have the hunt it is possible for you to to launch the dungeon by way of the map of the EDZ.
Rathil, First Damaged Knight of Fikrul
The primary boss struggle in Warlord’s Spoil is towards Rathil, First Damaged Knight of Fikrul. This boss struggle introduces Taken totems which should be was Stasis totems earlier than the Imminent Want timer counts down. The extra totems you alter, the longer the injury section.
- Clear enemies till you’re teleported right into a cage
- Destroy three Acolyte eyes to open cage
- Stand within the radius of the Taken totems till it turns right into a Stasis totem
- When Imminent Want timer ends, deal injury to Rathil
- Repeat the method as many occasions as essential
This primary boss introduces a number of totally different mechanics that might be repeated all through the whole dungeon. The primary mechanic is the Taken totems. Standing throughout the circle of the totem for a number of seconds will nullify the Taken aspect and switch it right into a Stasis totem. Each Stasis totem you create will improve the Naeem’s Want Empowerment buff, which is the injury section timer.
The subsequent mechanic is the Imminent Want timer. When this timer ends, the injury section will start. You have to nullify as many Taken totems as potential earlier than the timer ends.
The final mechanic is the Acolyte Eyes. Taking pictures Acolyte Eyes will trigger one thing to occur: opening a cage, spawning an enemy, stopping an enemy from transferring and so on.
To start the struggle, strategy or shoot the boss after which clear enemies. When you’re teleported right into a cage, shortly go searching your cage for Acolyte Eyes to shoot. They are going to be at numerous elevations. Destroy all three to unlock your cage. When enjoying with a bunch, it may be simpler to shoot the Acolyte Eyes which can be close to your buddy’s cages, that manner you’re not spinning round yours looking for them.
If you land on the bottom, stand throughout the Taken totems’ circle till it turns right into a Stasis totem. If the circles are shut or overlap you’ll be able to stand between them to nullify each directly.
If you are within the cage after which nullifying the totems, the Imminent Want counter might be counting down. At zero seconds, it is possible for you to to deal injury to the boss. The extra totems you cleanse, the longer the injury section. The injury section timer is named Naeem’s Want Empowerment.
As for dealing injury to Rathil, there are a whole lot of choices. He’s obtained a crit spot that’s straightforward to hit, he’s on the bottom so you’ll be able to stand close to him, and he doesn’t have a whole lot of well being. You possibly can use Sniper Rifles, Shotguns, even Swords to knock him down shortly.
After the struggle, you’ll be teleported to a jail cell the place you should remedy a puzzle.
Jail puzzle
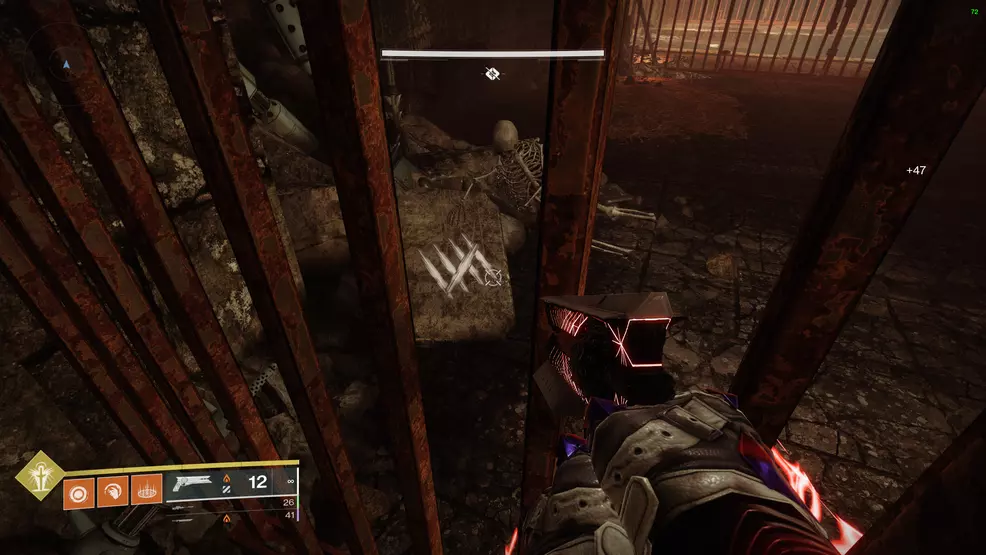
Supply: Shacknews
There are six dials within the jail puzzle that spin whenever you shoot them. You have to have some spinning clockwise and others spinning anti-clockwise. Search for the skeletons on the bottom with the tally marks. The variety of marks signifies the variety of dials that should be spinning a sure route. The white tally marks correspond to dials spinning clockwise.
For instance, if there are 4 white tally marks, 4 of the dials should be spinning clockwise, whereas the final two dials should flip anti-clockwise. Shoot the dials to start out them spinning and shoot them once more to cease. Taking pictures a 3rd time will spin them the wrong way.
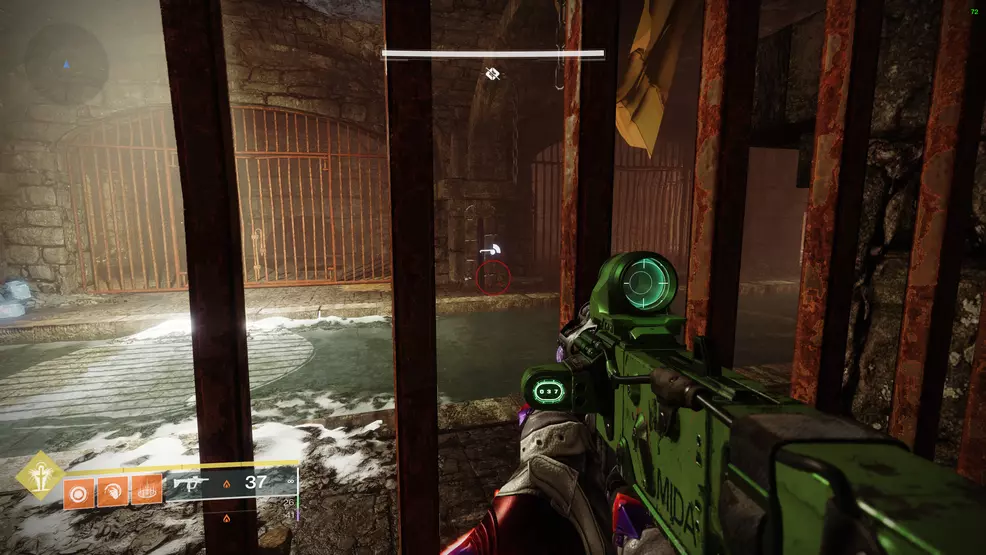
Supply: Shacknews
As soon as all the dials are spinning within the right route, shoot the lock on the wall to open the cells. Seize your loot after which preserve transferring by the dungeon maze. This maze is simple, simply comply with the primary path round, keep away from the spike panels within the partitions, and soar up by holes within the ceiling.
Locus of Wailing Grief
The second boss is named Locus of Wailing Grief and it retains the mechanics from the earlier struggle however provides in Photo voltaic Expenses. 4 Photo voltaic Expenses should be deposited within the braziers across the boss to start a injury section. In the course of the encounter, go close to the requirements (flags on a pole) to take away the Biting Chilly debuff.
- Shoot the Acolyte Eye to start out the encounter
- Destroy all Acolyte Eyes to summon the Damaged Knights
- Nullify the Taken totems the Damaged Knights create (defeat them if you would like)
- When the Imminent Want timer ends, take the Photo voltaic Expenses and deposit them within the braziers
- Repeat the above steps till all 4 braziers are alight
- Deal injury to the boss whereas standing close to one brazier till it’s extinguished after which go to a different
- Repeat the entire course of

For this boss struggle, as an alternative of the Taken totems including to the injury section timer, every Taken totem you nullify will create one Photo voltaic Cost. You have to deposit 4 of those Photo voltaic Expenses to start a injury section.
If you are defeating Damaged Knights and clearing the Taken totems, a debuff referred to as Biting Chilly might be counting as much as x10. You’ll die when it reaches x10 stacks. Across the fringe of the wall are requirements that quickly take away the debuff whenever you go close to them.
Start the struggle by taking pictures the Acolyte Eye, this can summon the Locus of Wailing Grief. Defeat enemies after which destroy the brand new wave of Acolyte Eyes to summon the Damaged Knights. Defeat the Damaged Knights if you wish to, however the primary factor it’s essential do is stand close to the Taken totems to show them into Stasis totems.
Each Stasis totem you create will generate one Photo voltaic Cost when the Imminent Want counter reaches zero. You have to then deposit a Photo voltaic Cost at every of the 4 braziers across the boss. Repeat the method till all 4 braziers are alight.
When the fourth brazier is ignited, the injury section will start. You may solely deal injury to the boss when standing round a brazier as this can give the Naeem’s Want Empowerment buff. When the buff ends, transfer to a brand new brazier to proceed the injury. When all 4 braziers are used, fall again to the beginning place and repeat the method.
By way of boss DPS towards the Locus of Wailing Grief, the present meta damage-dealer is a Strand Titan. Aztecross has a robust Strand Titan construct that options Banner of Warfare, Synthoceps, a One-Two Punch Shotgun, and Tractor Cannon. Nonetheless, for many Fireteams, the best choice in the case of injury might be Dragon’s Breath, Legendary Rocket Launchers (like Apex Predator), and even Sniper Rifles (like The Supremacy).
Lastly, don’t forget concerning the Biting Chilly debuff. This might be always ticking when the Imminent Want counter goes. Fall again to the sting of the wall and go close to the requirements (flags on a spear) to heat your self and take away the debuff.
When this encounter is completed, you’ll simply must get by a pair extra leaping puzzles earlier than the final boss.
Hefnd’s Vengeance, Blighted Chimaera
The ultimate boss in Warlord’s Spoil is towards Hefnd’s Vengeance, Blighted Chimaera. This struggle retains the Taken totems however introduces a “tag” mechanic. You’ll struggle across the exterior of the sector whereas dealing injury, after which do a correct injury section on the prime earlier than repeating the method. Destroying the boss’ Acolyte Eyes extends the injury section.
- Destroy the Taken Blight to start out the struggle
- Destroy the Acolyte Eyes across the boss to spawn the Damaged Knights that summon the Taken totems
- Stand close to the Taken totems to show them into Stasis totems
- Melee Corrupted Hex-Drinkers to present them Hex of Vengeful Corruption (do not allow them to tag you again)
- When the Imminent Want expires, deal injury to the boss
- Repeat the method or soar as much as the following space (anti-clockwise) and do the steps once more
- On the prime of the sector, stand on one island and deal injury to the boss
- Soar to a different island when the boss strikes location and proceed the injury section
- Repeat all of the steps till the boss reaches the final chunk of well being
- Preserve damaging the boss till it dies – there is no such thing as a time restrict

The struggle towards the Blighted Chimaera takes place on fracture land lots that spiral up into the sky. You have to deal sufficient injury to the boss at every main island to push it to the following one. After dealing injury 3 times, it would attain the highest and you should have a bigger injury section unfold out throughout three small sections of land. Throughout this remaining part, destroying the boss’ Acolyte Eyes will lengthen the injury length.
Start the struggle by destroying the Taken Blight. At this level, the boss will summon Acolyte Eyes and Taken Blights. The blights will poison the bottom, however you’ll be able to destroy them to cleanse the world. Destroying the Acolyte Eyes will summon the Damaged Knights, which in flip summon the Taken totems.
Stand close to the Taken totems till they flip into Stasis totems. Extra Stasis totems means an extended length of the Naeem’s Want Empowerment buff (injury section buff). Whereas that is occurring, you’ll obtain a 17 second debuff referred to as Hex of Vengeful Corruption that may kill you when it reaches zero. Melee a Corrupted Hex-Drinker to present it the deubff – it would attempt to melee you to present it again.
When the injury section begins, unleash sufficient injury on the boss to knock it right down to the edge on its well being bar. If you happen to don’t attain this mark, the boss is not going to transfer to the following part of the mountain and you should repeat the steps. When it does transfer, soar as much as the following part and repeat the method. You’ll have three of those island injury phases earlier than you attain the highest of the mountain – which is the place the actual injury section begins.
On the prime of the mountain is a hoop of three islands. Just like the earlier boss struggle’s braziers, when you stand on an island, it’s thought of “used”, even when the boss isn’t dealing with that island. Coordinate along with your workforce so that you all go to the precise space.
Stand on a piece of the land and begin dealing injury to the boss. Throughout this, the boss might be summoning Acolyte Eyes – if all the Acolyte Eyes are up directly, the boss will go immune and transfer to a different part. The trick is to try to destroy any Acolyte Eyes to basically improve the length of time you’ll be able to stand in a single spot.
When the boss strikes, soar round to a different piece of the island and preserve damaging it and destroying the eyes. In any case three land lots are used, you’ll be teleported to the underside to do the entire course of once more. This may proceed till the boss’ well being hits that final, small section – that is the ultimate stand.
The ultimate stand portion is totally different to a raid boss’ remaining stand: there is no such thing as a time restrict. You can be teleported to the highest of the floating islands and can have so long as it’s essential defeat the boss. In contrast to earlier than, defeating the Acolyte Eyes doesn’t do something particular, it simply cuts down on the variety of issues taking pictures you.
By way of DPS, as a result of the boss is floating at a distance you need to keep away from utilizing issues like Shotguns or something that depends on melees. Throughout Season of the Want, Rocket Launchers are performing extraordinarily effectively, particularly Apex Predator, in addition to Sniper Rifles like The Supremacy. Think about using Sunshot to assist take care of enemies and to effectively take out the Acolyte Eyes.
As soon as Hefnd’s Vengeance, Blighted Chimaera is defeated, a chest will pop up proper in entrance of you. Keep in mind to seize the Ahamkara bone from beside the chest. This is likely one of the 10 Ahamkara bones it’s essential unlock one of many dungeon Title Triumphs. Check out our Future 2 Technique Information for extra dungeon and raid assist.
